Welcome to Quick Start Tutorials
This page will provide a glimpse into getting started with our service.
While our service is complex we have tried to provide an easy to use interface with inuitive navigation and data flow.
If you have questions or need help just give us a shout.
Creating an Account
Creating your Subscriptions Only account is fairly straight forward.
Follow this link and after filling out the Contact Information (1) click "Sign Up Now" (2).
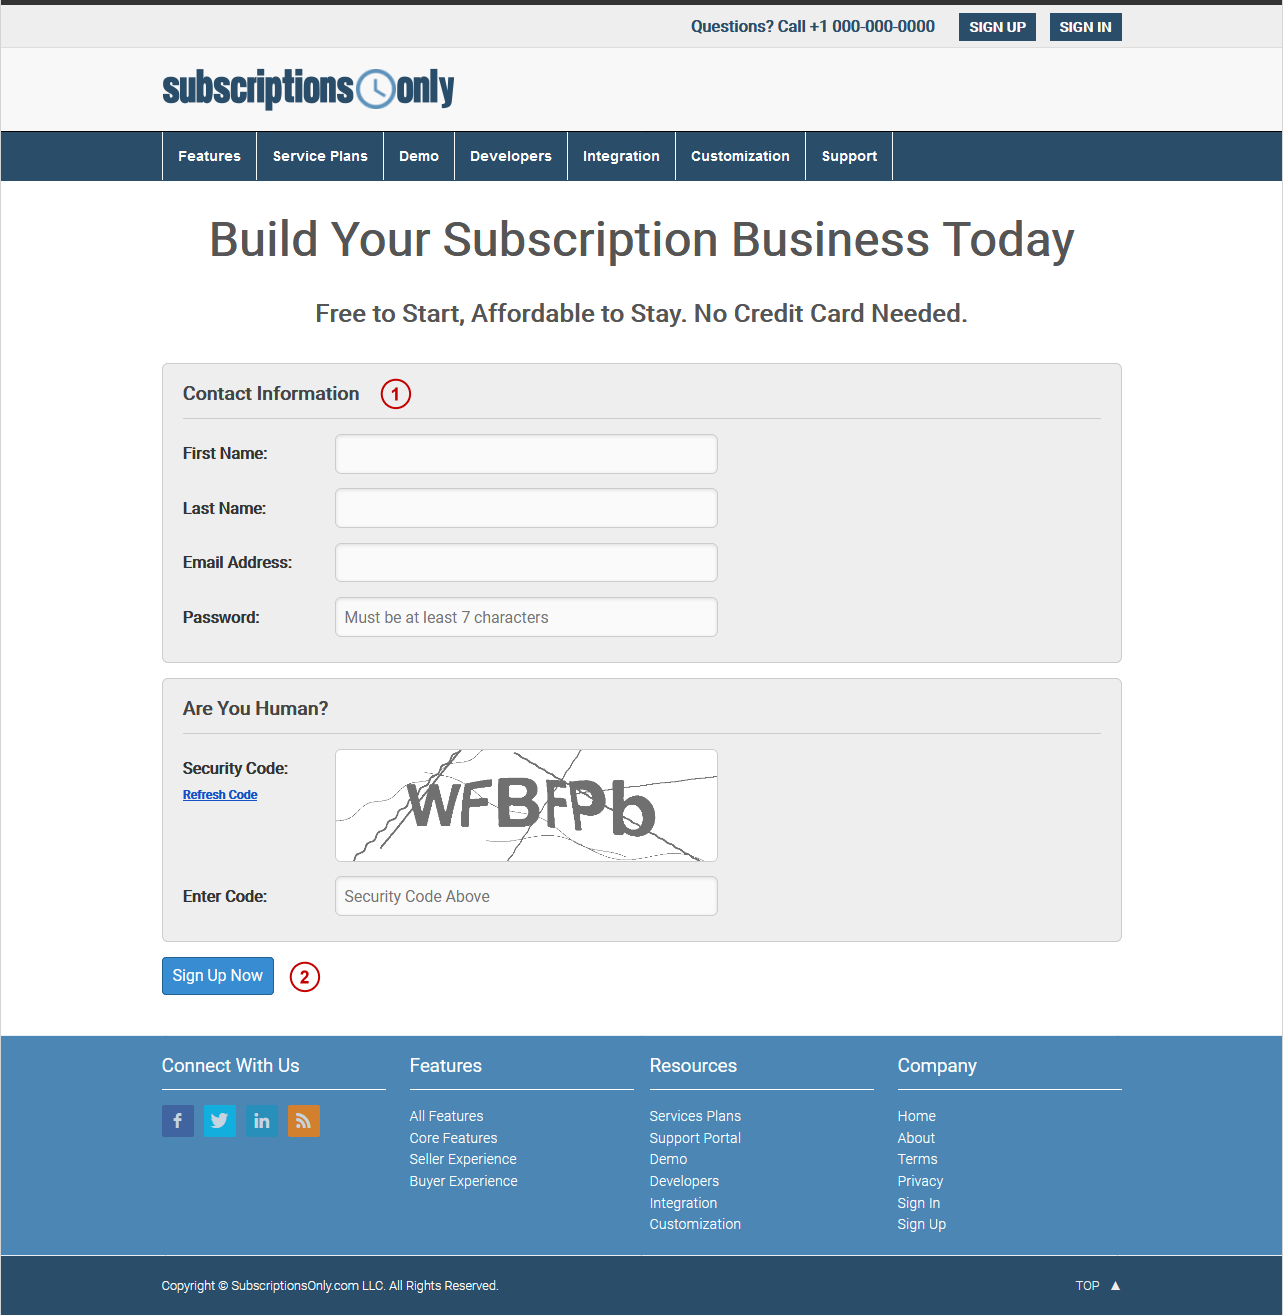
After submission you'll receive an email asking to verify your email. Just click on the verification link in this email and the system will create your account and you'll be ready to sign in.
Creating an Account Profile
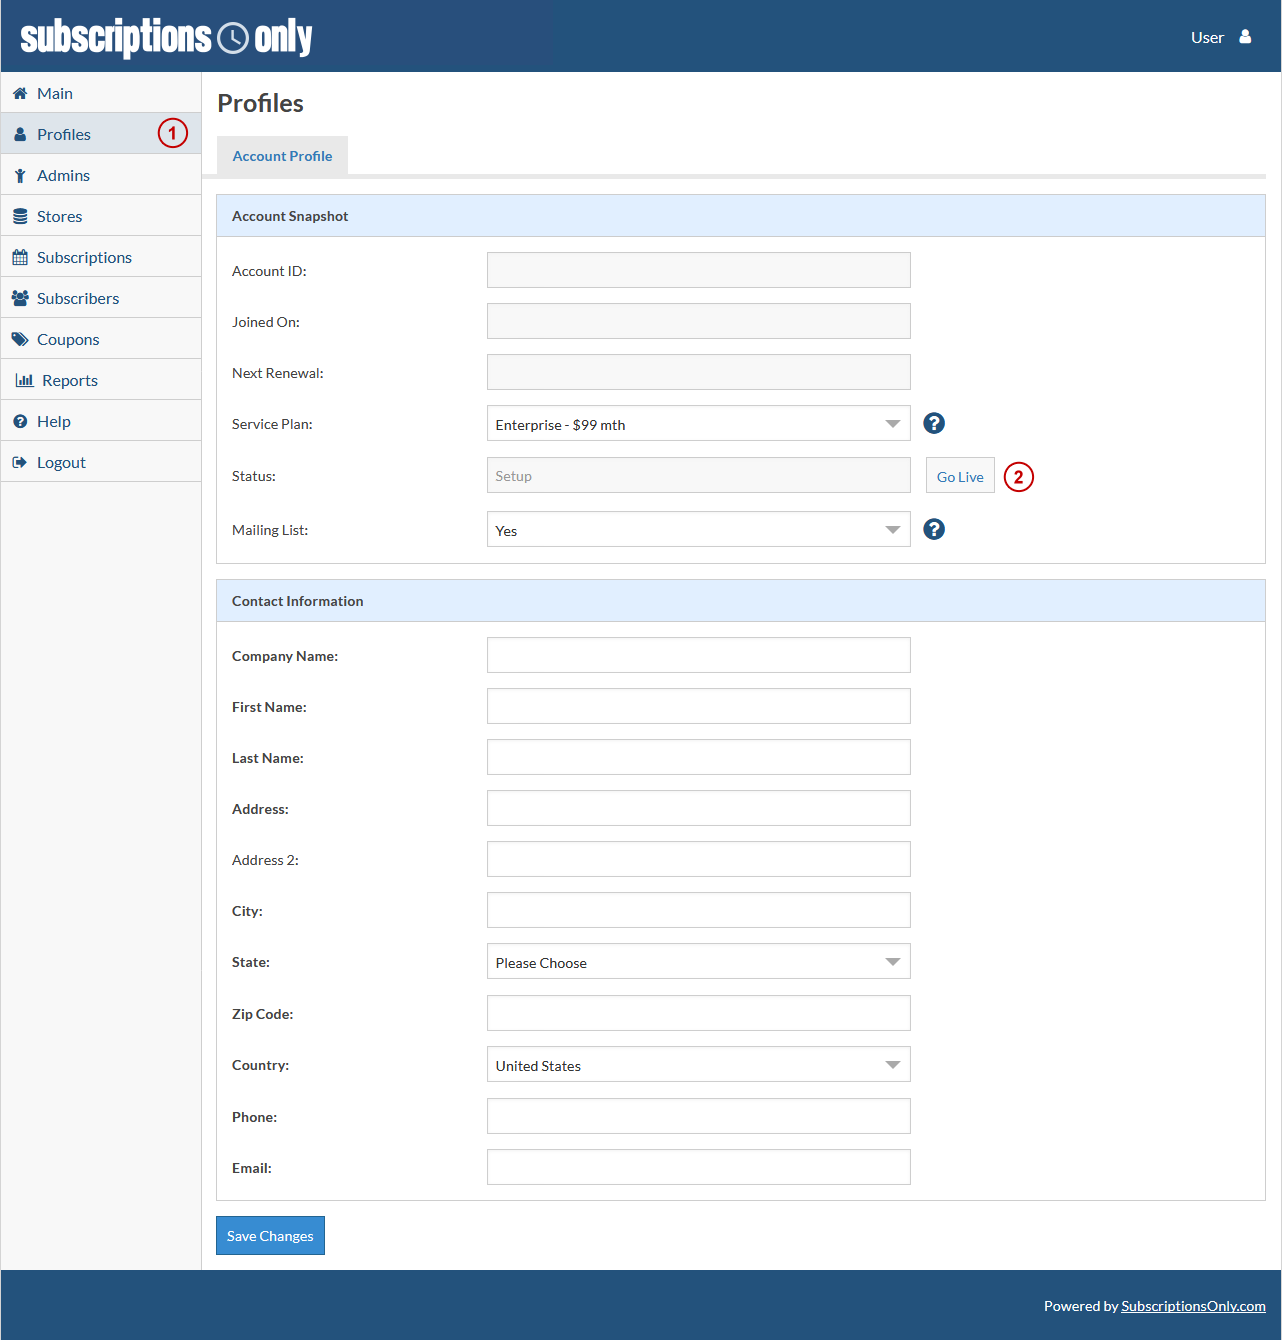
To create your Account Profile sign in to the Sellers Dashboard here.
Once you are logged in click Profile (1), then click the Account Profile tab (2).
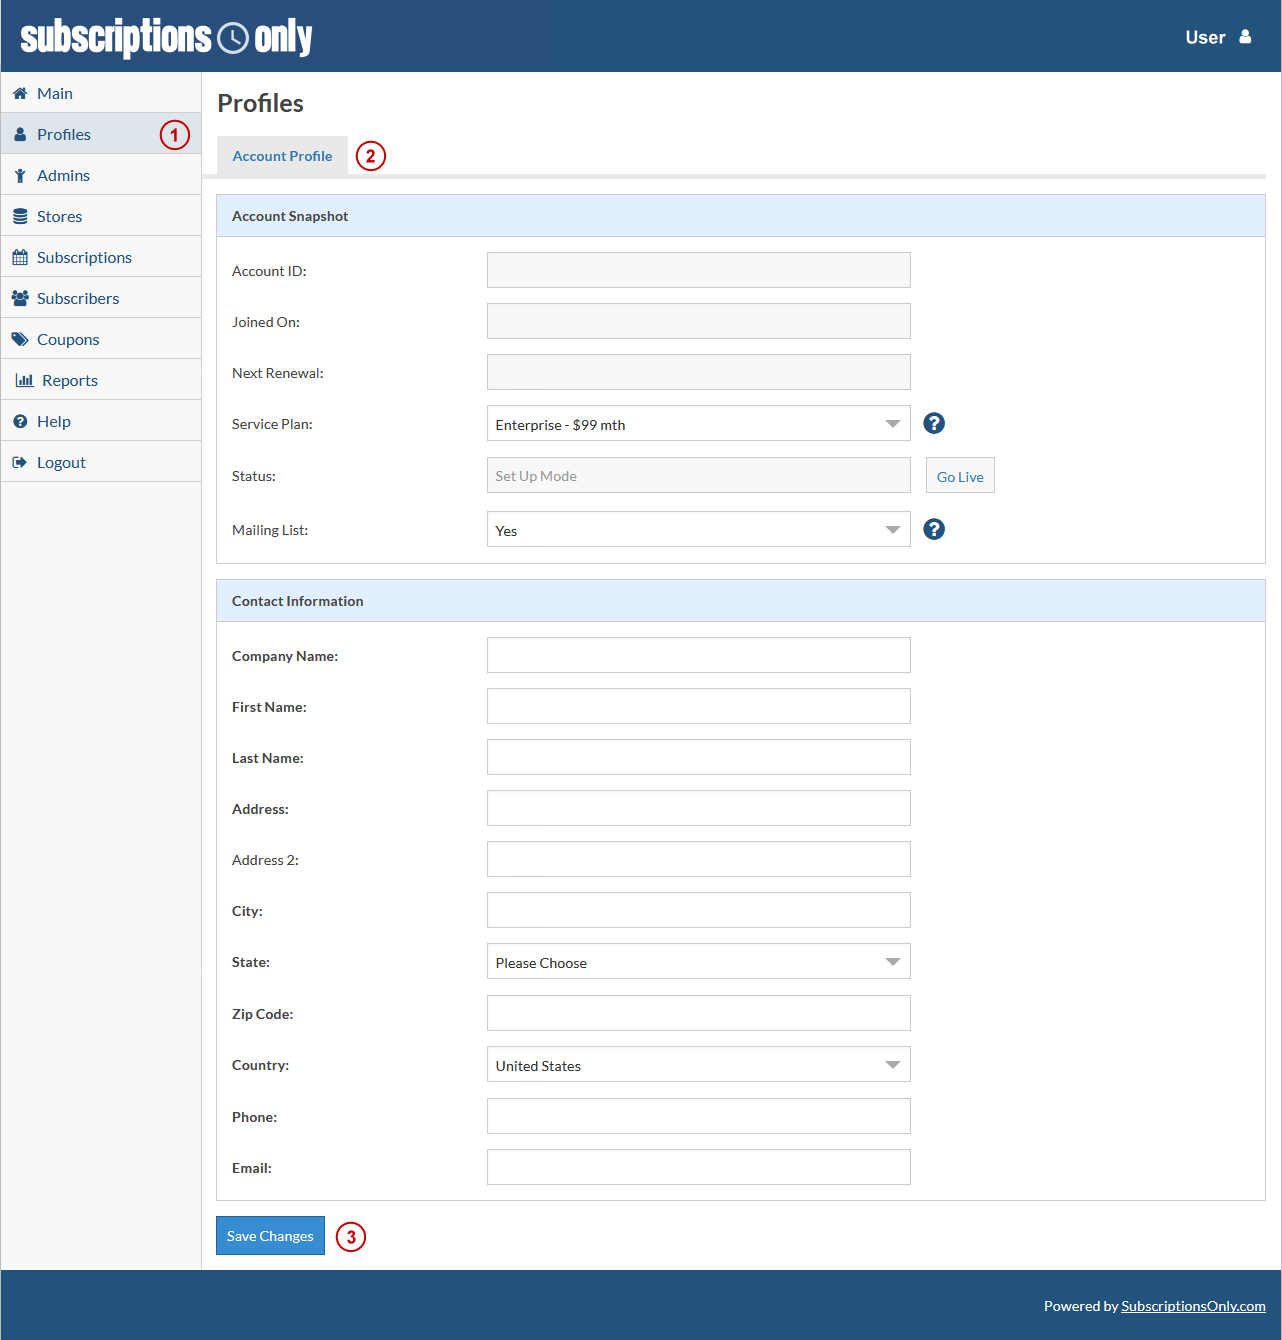
Fill in all required fields and click "Save Changes" (3).
Note the blue circles with question marks () are On Page Tutorials (OPT's). These tutorials provide quick information about the field it's next to and/or it's function.
Creating Admin Users
To create an Admin, click on Admins (1) and then click on Create Admin (2). In addition to the Account Information and the Access Information you'll need to provide permissions (3) for your new Admin.
After all required fields have been completed click "Create Admin" (4).
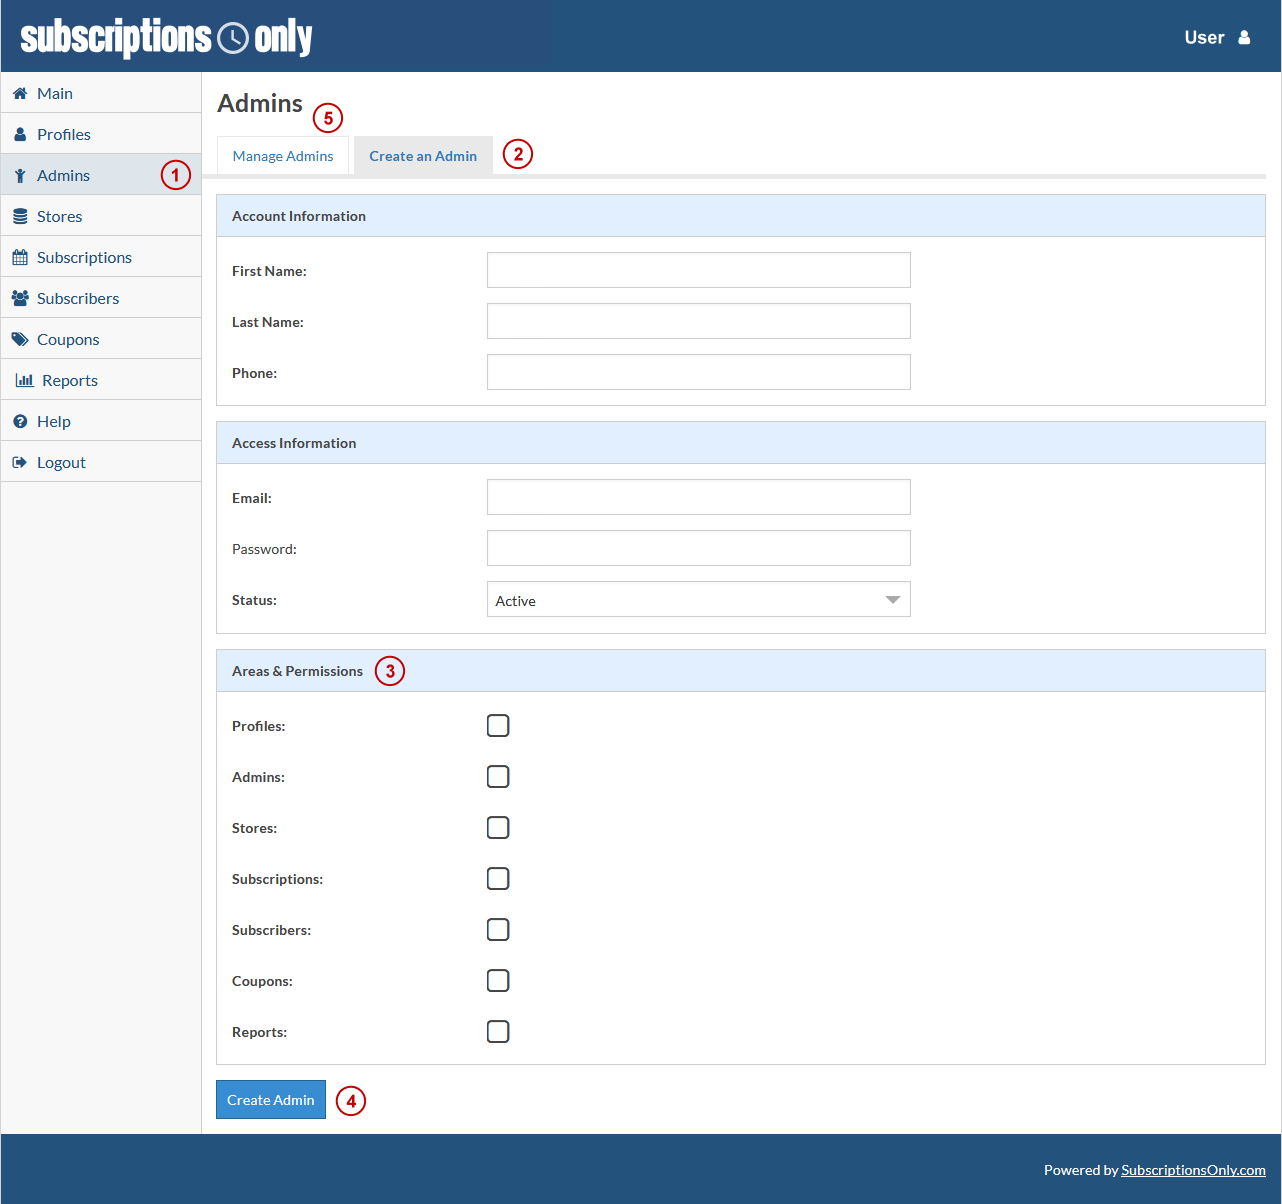
Once completed managing all of your Admins from the Manage Admins tab (5) is fast and simple.
Note one permission is required.
Creating a Store
To create a Store, click on Stores (1) and then click on Create a Store (2). After all required fields have been completed click "Create Store" (3).
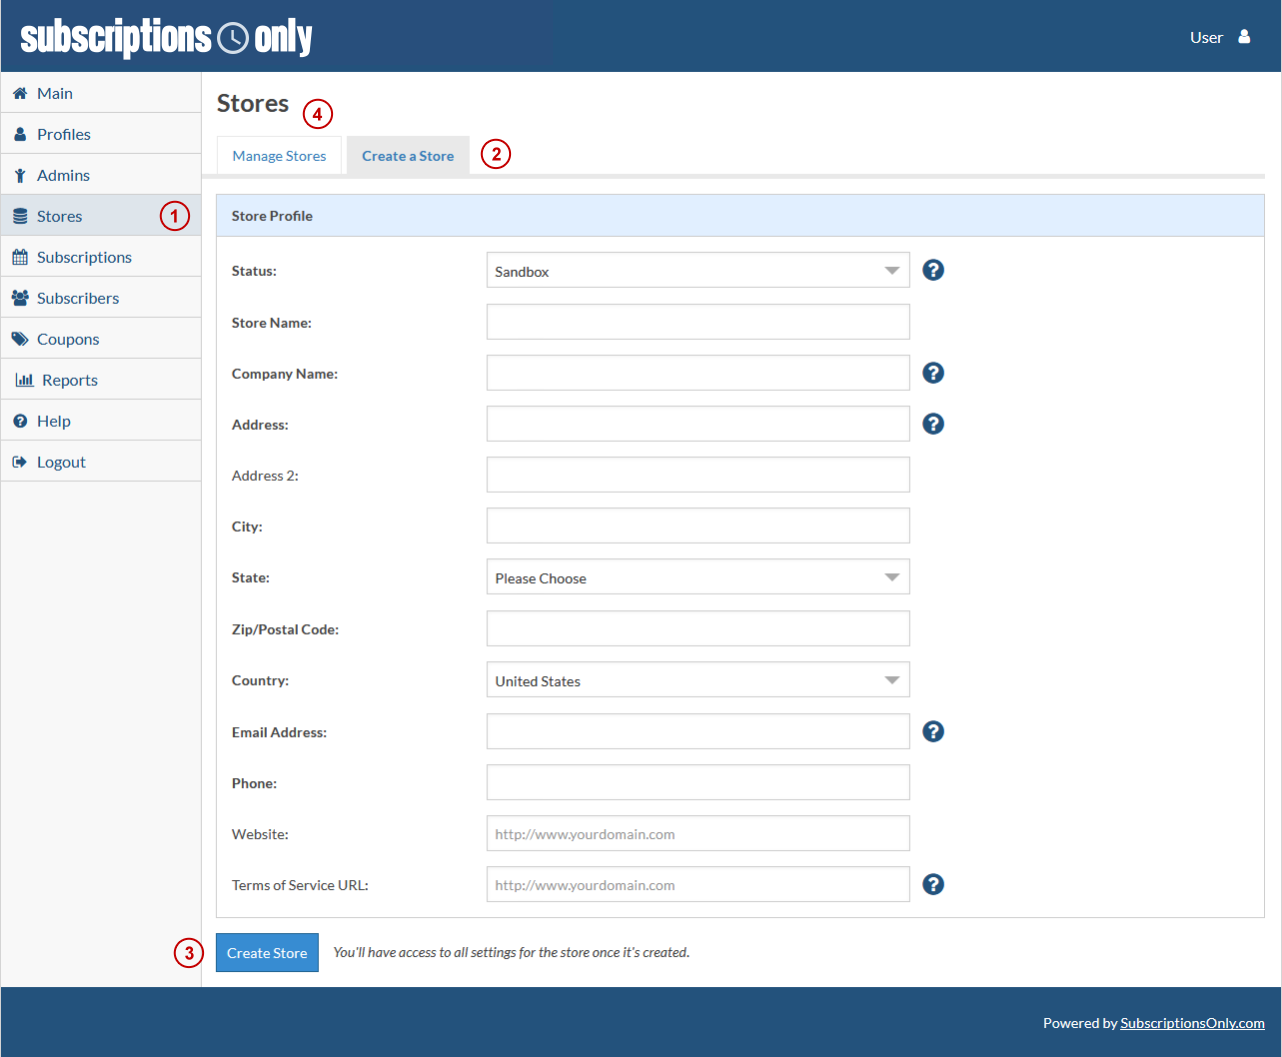
Upon creation the system will bring you back to the Manage Stores tab (4). From this screen management of your store settings is fast and simple.
For complete information on Managing your Store, click here
Creating a Subscription
To create a Subscription, click on Subscriptions (1) and then click on Create a Subscription (2).
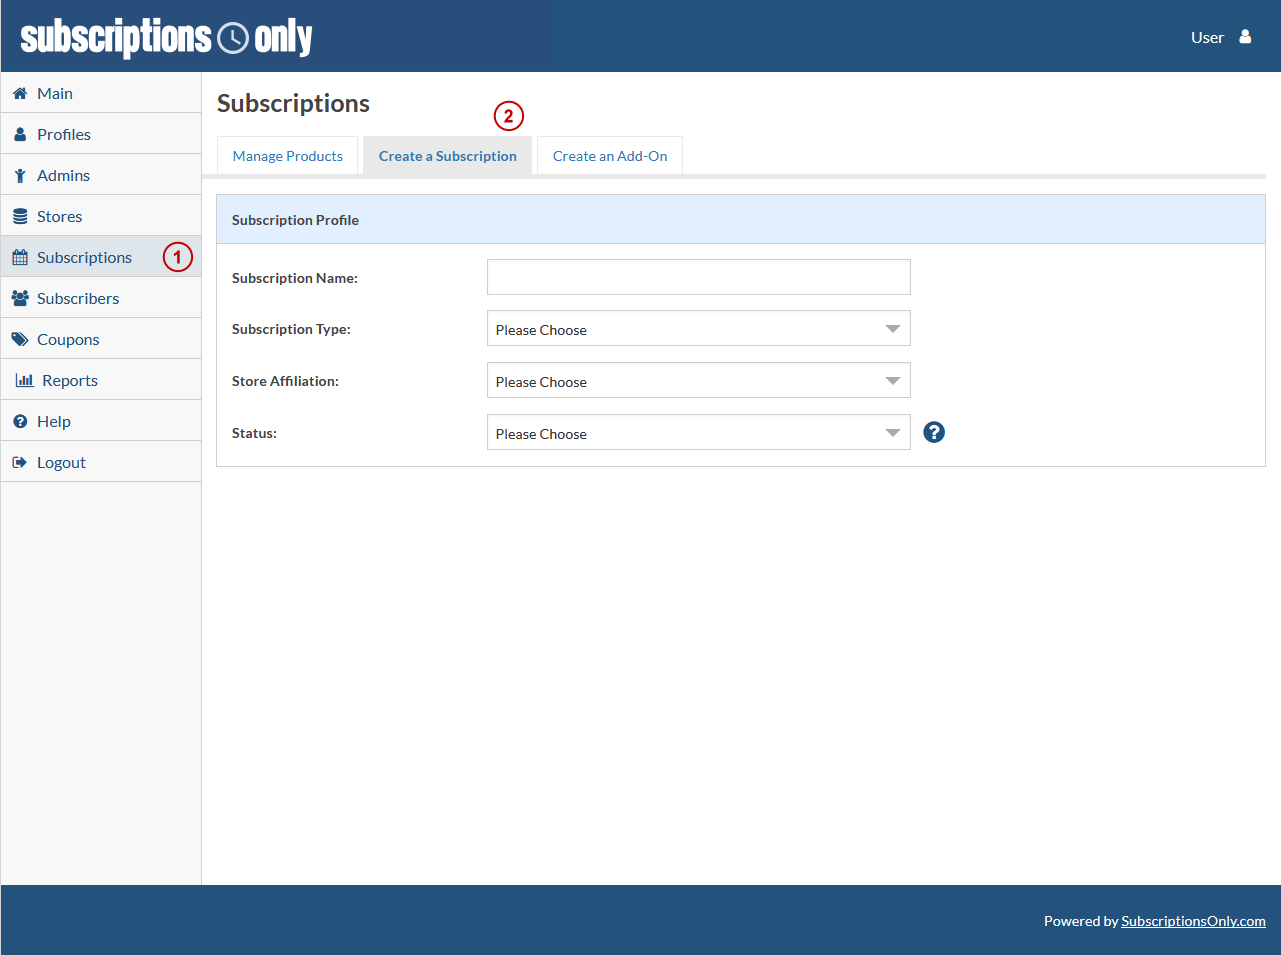
At this point you have to make a decision about the type of Subscription you want to set up and which Store it's associated with.
There are three types of Subscriptions available with our Standard Service Plans (the sky is the limit with our White Label Service Plan):
Subscription Type 1 - Fixed or One Time
This type of Subscription allows you to charge a Fixed Rate with Pre-set or Custom Billing Cycles with Unlimited Billing Options.
Subscriptions Type 2 - Seat Based
This type of Subscription allows you to charge a Per Seat Rate with Pre-set or Custom Billing Cycles with Unlimited Seat Rules.
Subscriptions Type 3 - Usage Based
This type of Subscription allows you to charge a Per Usage Rate with Pre-set or Custom Billing Cycles with Unlimited Usage Rules.
For complete information on Managing your Subscriptions, click here
Creating a Coupon
To create a Coupon, click on Coupons (1) and then on Create a Coupon (2).
Once all information has been entered, click "Create Coupon" (3).
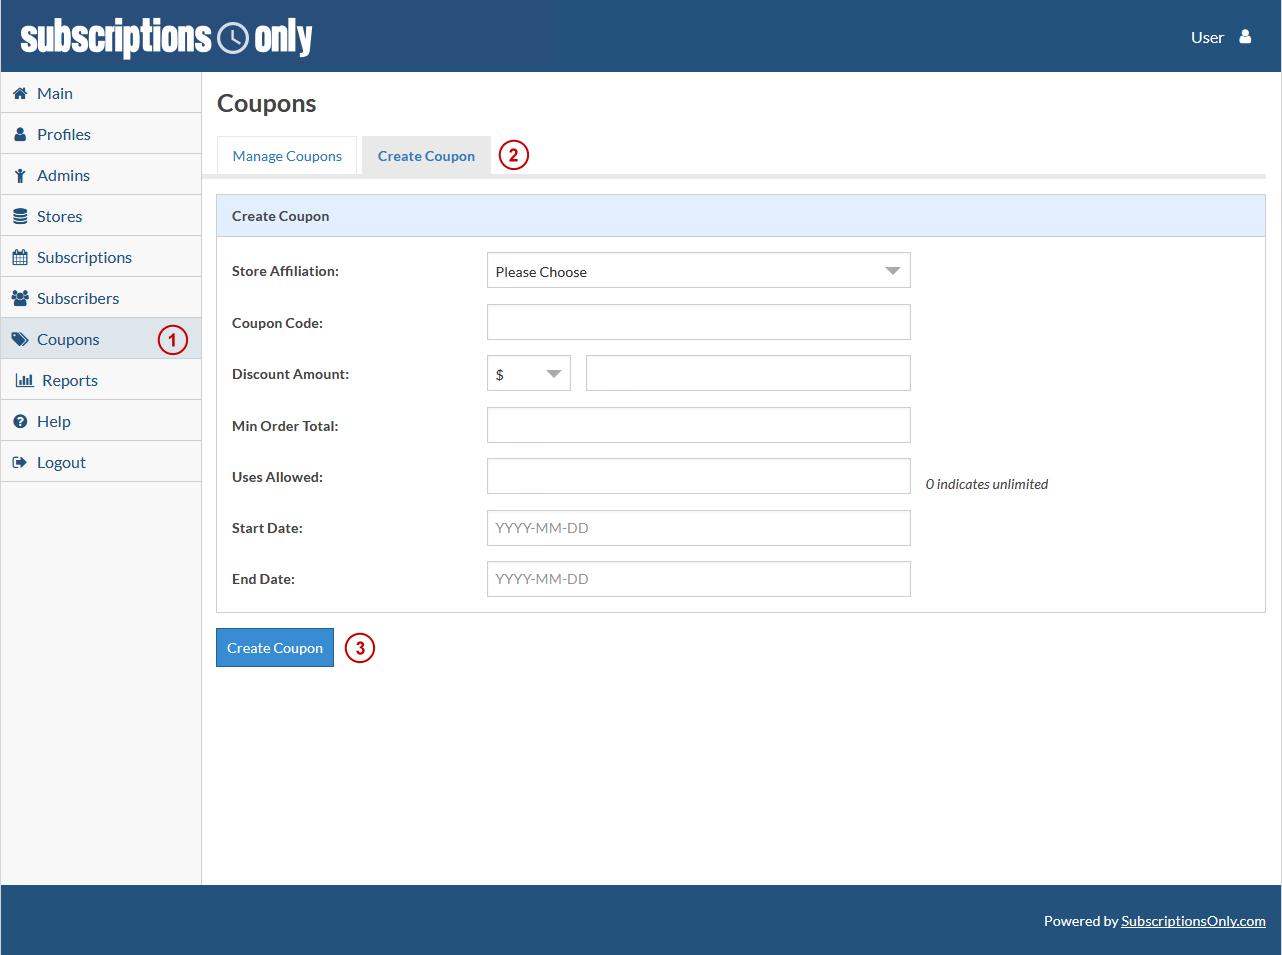
When the coupon has been created successfully, you will be brought back to the Coupons page where you can manage your coupons or create another.
Coupons can be entered on the Hosted Pages checkout as well as submitted through the Application Programming Interface (API).
Note all fields are required.
Testing
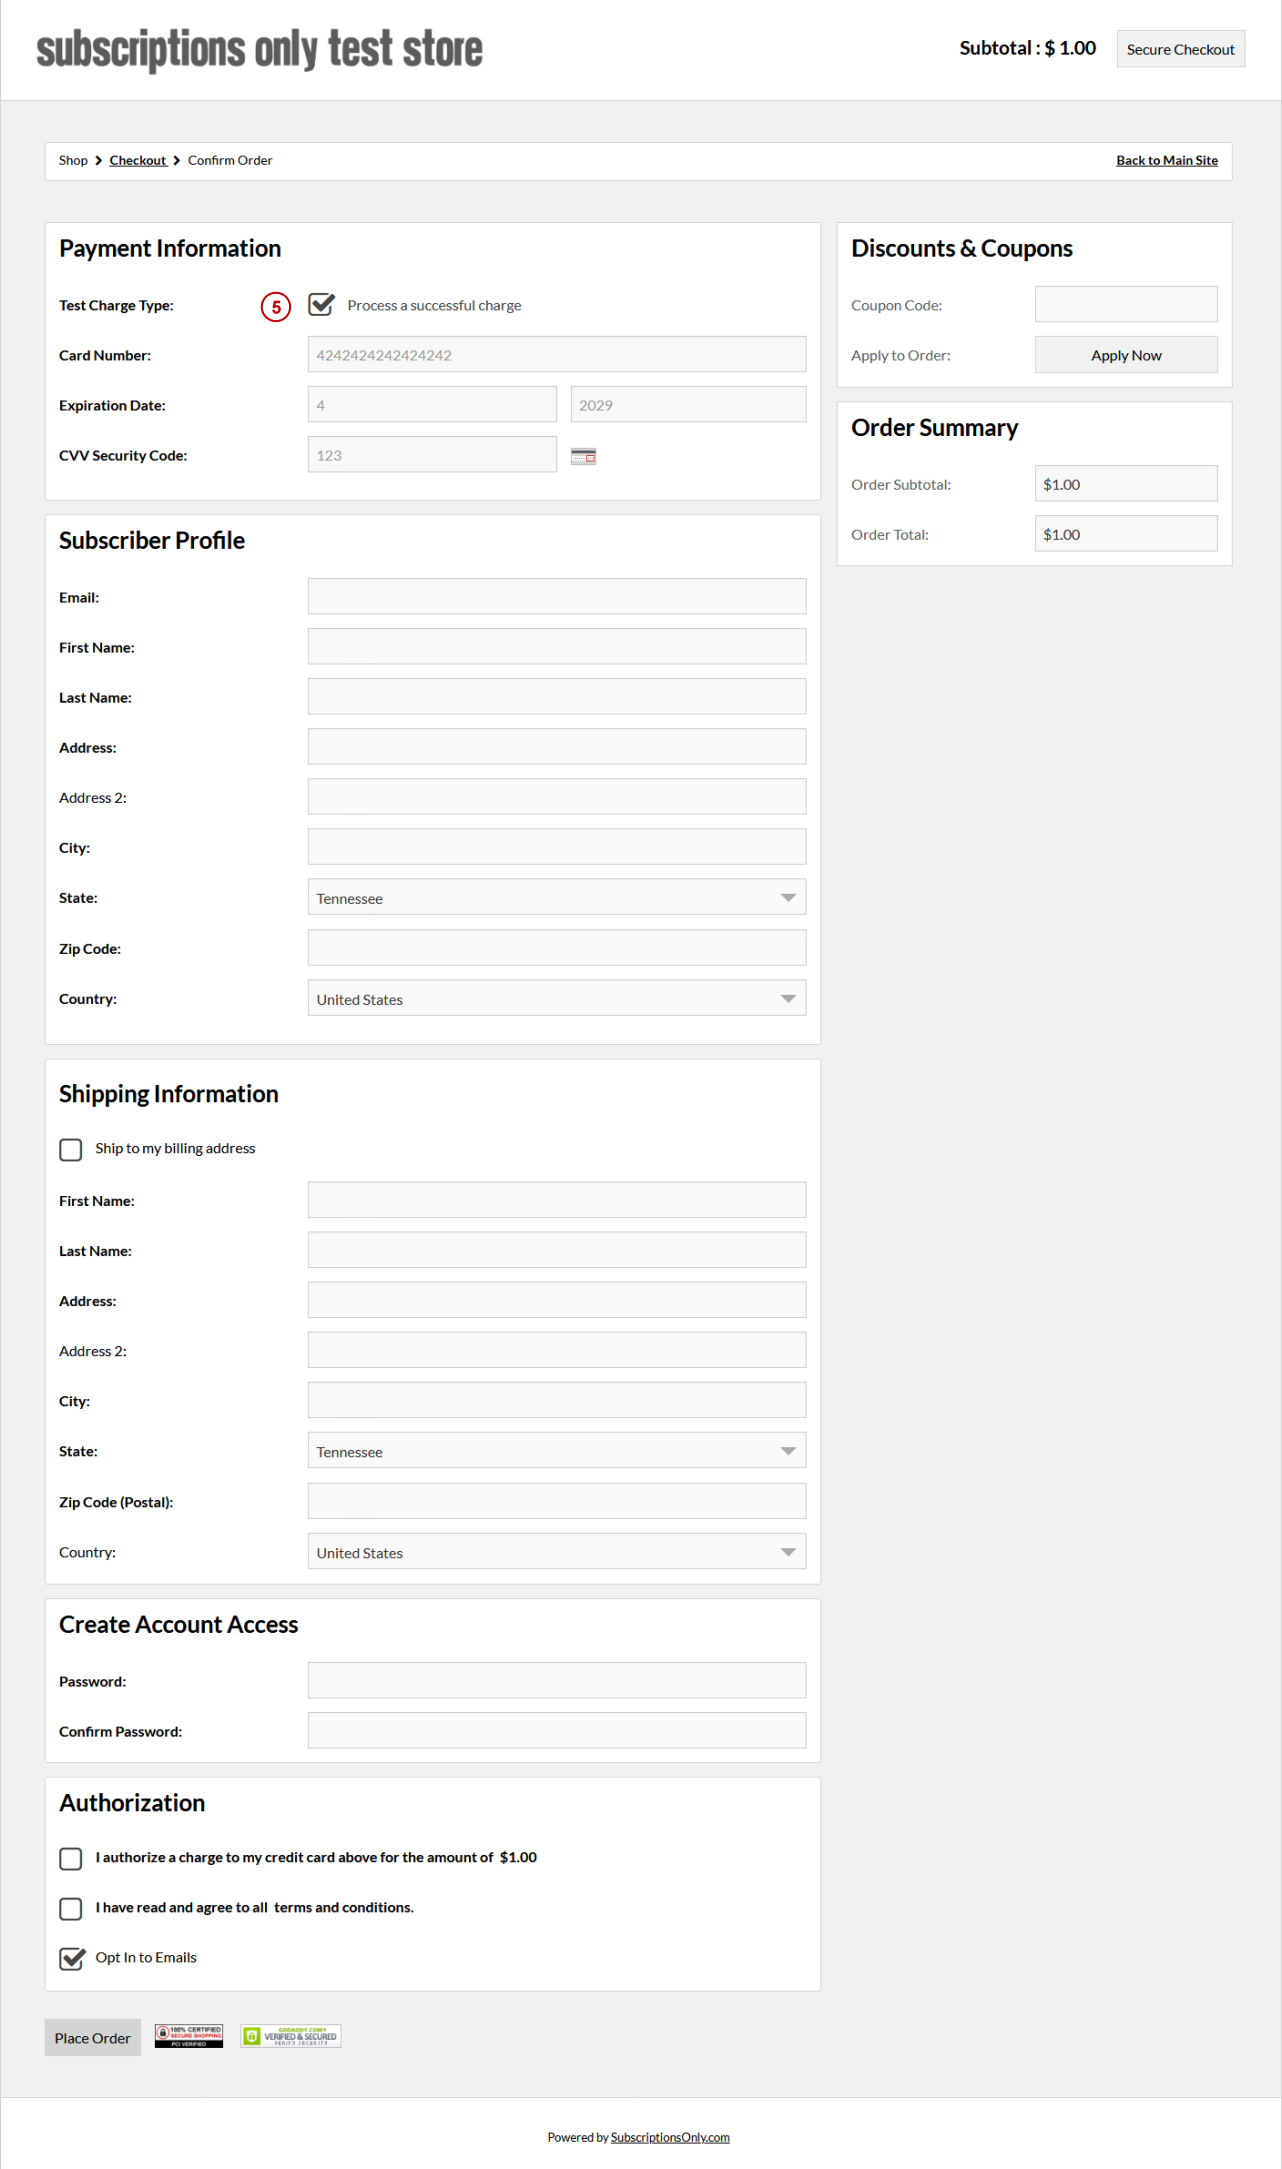
Testing your store before going live is essential and we’ve built a really cool tool to help. While your store is in Sandbox mode you can easily create test orders to get familiar with reports, invoices, etc. Here’s how it works.
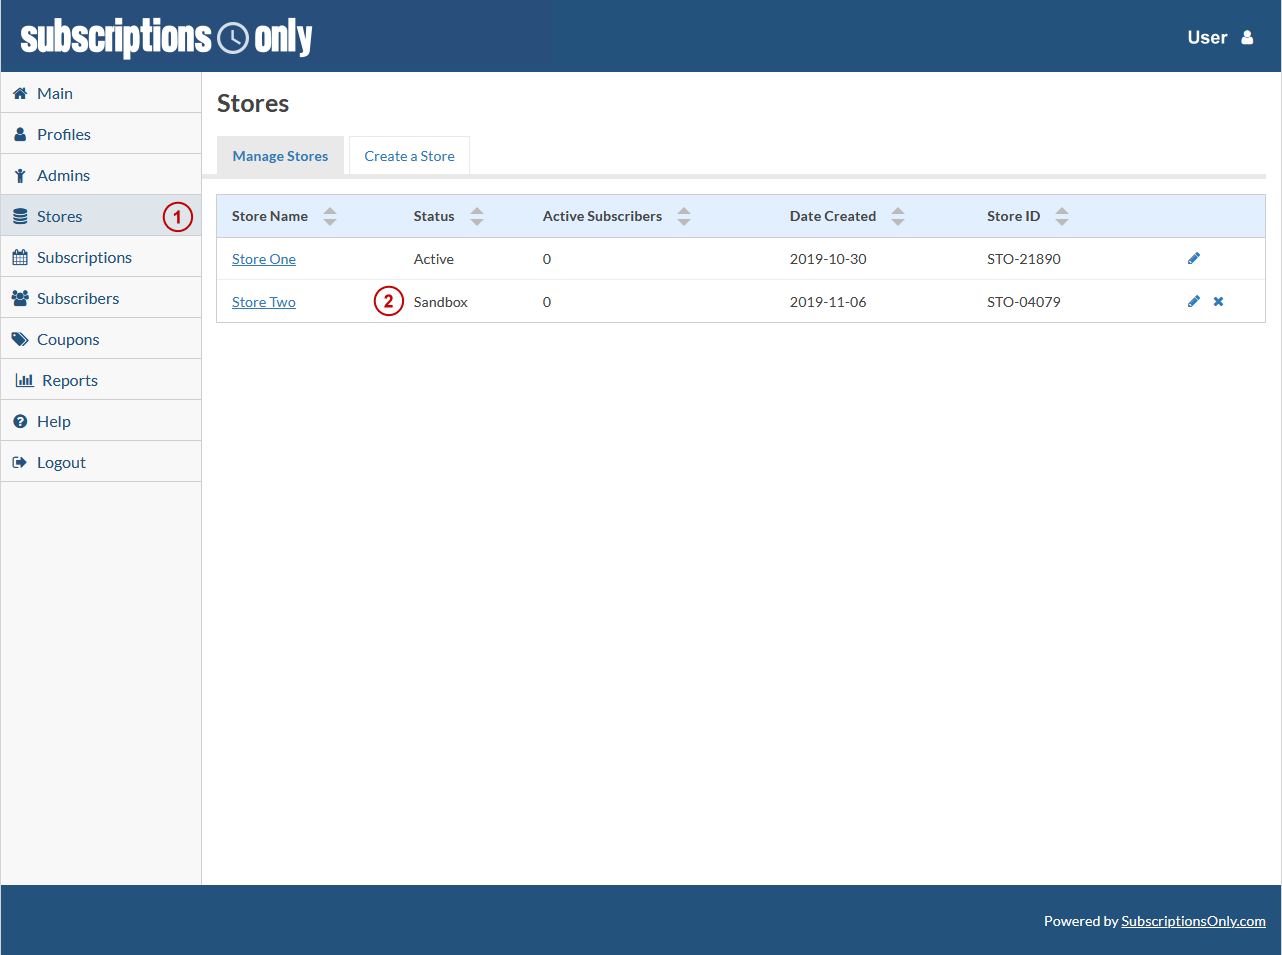
First lets make sure your Store is in Sandbox Mode. Sign in to the Seller Dashboard and click Stores from the left Menu (1). If the Status is labeled as Sandbox (2) you are good to go. If you change your store status to Active this testing feature will no longer be available.
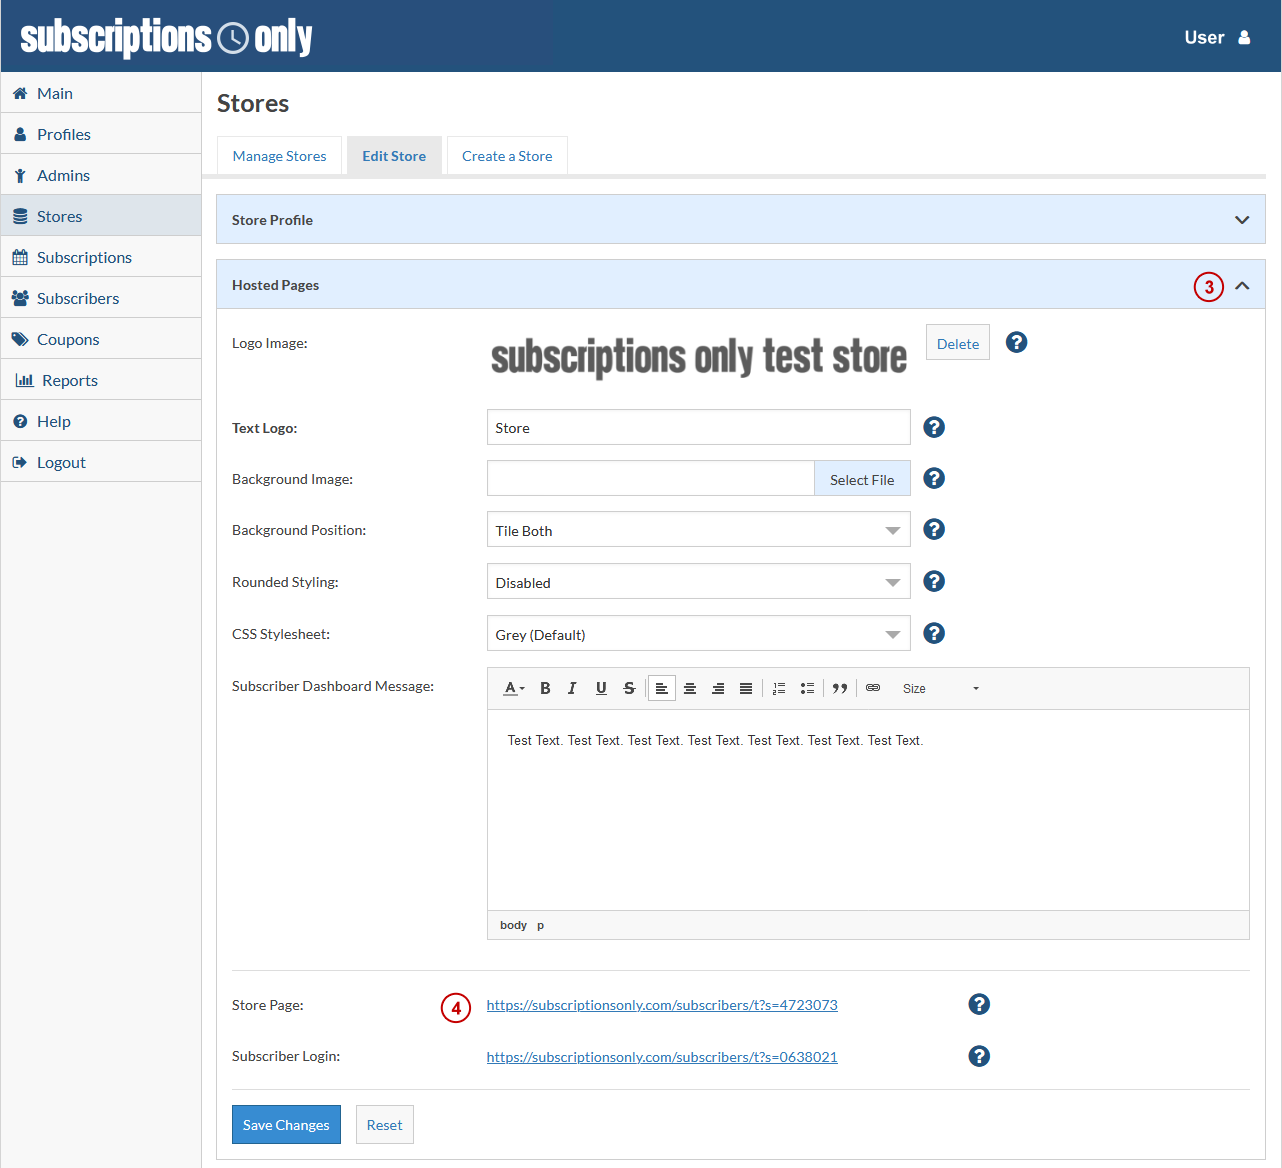
We now need to grab the link for the Hosted Store Pages. Click the icon. After the page refreshes choose Hosted Pages (3) and navigate to the Store Page link (4).
While on the store page add items to your cart and click the Secure Checkout button. On the checkout page you can apply coupon codes, sign in as a returning customer, and select a test charge type. To process a successful charge leave the Test Charge Type (5) checkbox selected. To process a failed charge uncheck the Test Charge Type box. Testing a failed charge will return a different error code depending on your Payment gateway, a successful charge will bring you to the confirmation screen.
The orders placed while in Sandbox mode will appear in your dashboard exactly like they will when you Go Live (Active). This gives you a chance to experiment with functionality like creating reports, viewing charts, and interacting with Subscriber Profiles. Once your store is moved out of Sandbox mode the testing orders will be deleted, all of your Subscriptions, Add-Ons, Shipping Methods etc. will remain, but data related to the test order will be removed giving you a fresh start for your live store.
Going Live
To Go Live click Profile (1), then click on Go Live (2). You'll be transported to the Payment Profile page.
Once on the Payment Profile page (1) fill in all required fields and click "Save Changes" (2).
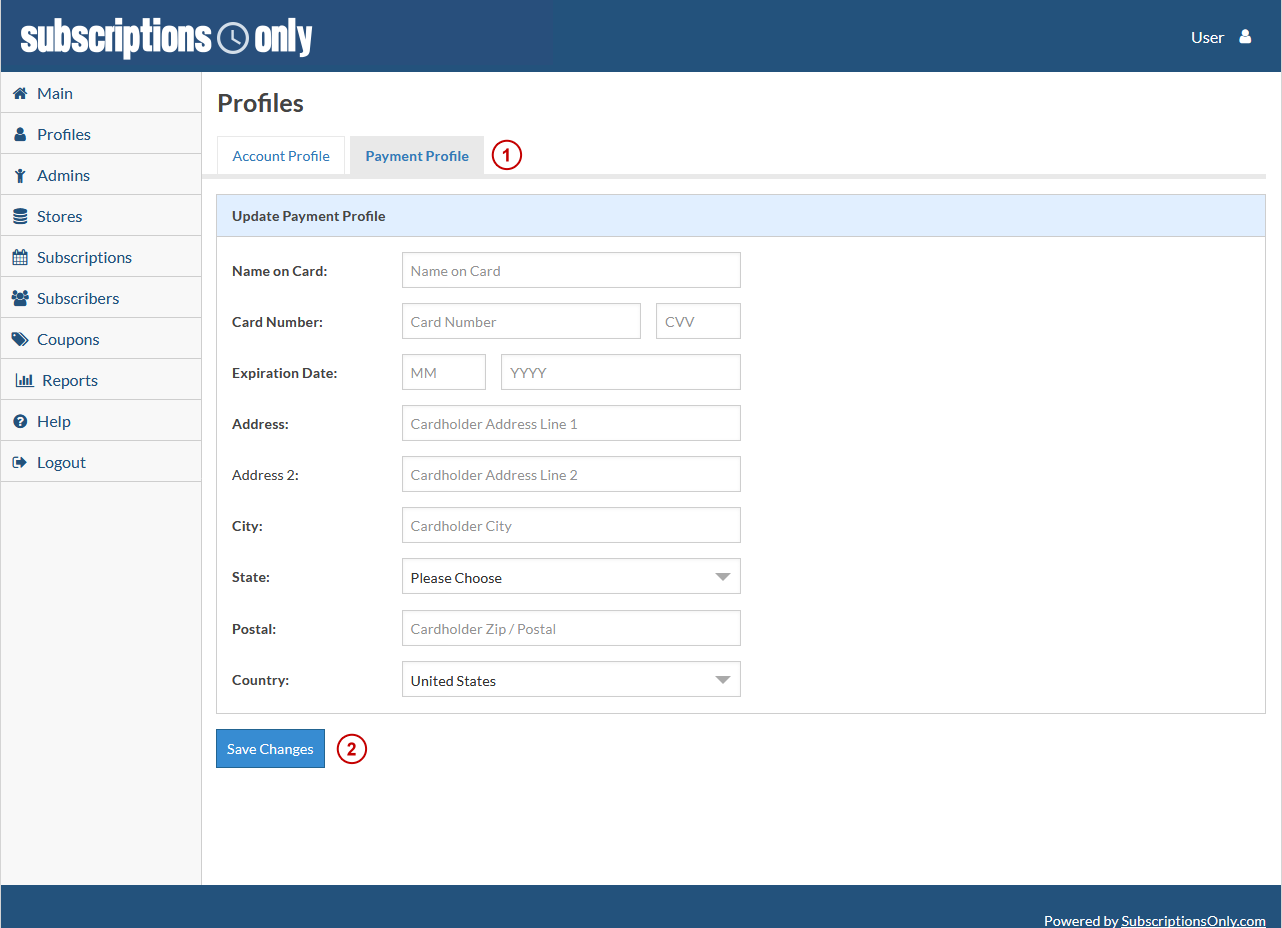
Note your card will be charged Service Plan fees in advance and Usage fees in arrears.